+86 139 2233 0292


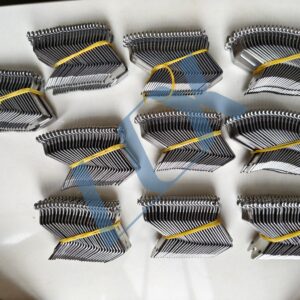
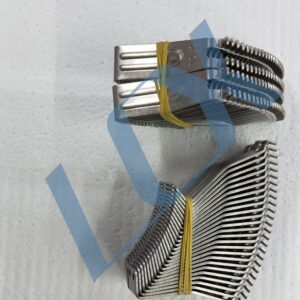
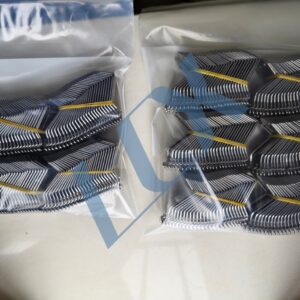
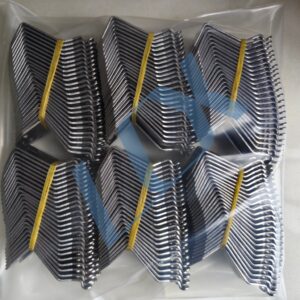
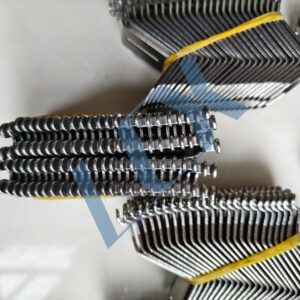
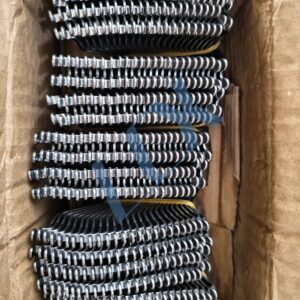
Used in wave soldering equipment to clamp and convey PCB boards, allowing them to pass smoothly over the molten solder wave and complete the soldering process of electronic components. The comb-like design of the claw precisely secures the PCB, preventing shifting, dropping, or jamming, thereby ensuring continuous and stable soldering.
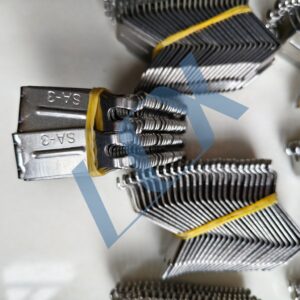
Model: SA-3 (universal specification for SUNEAST and other brand wave soldering machines)
Material: Industrial titanium alloy (or stainless steel with titanium plating) – features high temperature resistance, corrosion resistance, non-soldering (non-wetting), wear resistance, and deformation resistance. Suited for high‑temperature solder pots of 230–260°C in wave soldering equipment, with long service life and resistance to damage.
Structural Features
L‑shaped / comb‑tooth claw design. The hook‑like structure of the claw securely grips the edge of the PCB. Multiple claws can be stacked and mounted on the conveyor chain of the machine, forming a continuous transport track for mass production PCB handling.
Industry Application
Widely used on wave soldering production lines in electronic assembly plants. It is an essential accessory for soldering through‑hole components (DIP process), directly affecting soldering yield and production efficiency.
Share to:
The SA-3 is a universal standard model for wave soldering machines, primarily compatible with the following brands and models:
| Brand / Series | Typical Models | Remarks |
|---|---|---|
| SUNEAST | FM-350, FM-450, FM-650 series | SA-3 is SUNEAST’s factory standard double-hook claw specification |
| JT | Lead‑free wave soldering series | Same specification, directly replaceable |
| NST / Kelong | Standard wave soldering equipment | Universal mounting dimensions |
| Other domestic brands | Honghui, Changrong, Xinhe, Taike, etc. | Check chain pitch and claw type compatibility |
| Parameter | Standard Specification | Optional |
|---|---|---|
| Material | Industrial titanium alloy (high temperature resistance, non‑soldering) | Stainless steel with titanium plating / hardened titanium alloy |
| Thickness | 1.5 mm (standard) | 1.0 mm / 2.0 mm (heavy‑duty) |
| Mounting chain | 3.5‑pitch chain | Standard pitch 9.525 mm |
| Claw type | L‑shaped double hook / comb‑type hook | Customised for PCB edge clamping |
| Compatible PCB thickness | ≤2.5 mm standard PCB | Custom claw depth for special thickness |
Safety preparation – Stop the machine, turn off power, and allow the solder pot to cool to a safe temperature before operating.
Remove old claws – Open the chain cover, use a tool to loosen the fasteners on the chain shaft, and remove the worn titanium claws.
Install new claws – Align the SA‑3 titanium claw with the chain shaft hole, push in smoothly, ensure all claws face the same direction and are not tilted.
Adjust and calibrate – After tightening the fasteners, manually rotate the chain to check for smooth operation. Ensure no jamming and that the gripping gap is uniform (standard gap: 1.2–1.5 mm).
Test run – Run the machine empty, observe chain transport stability, confirm no deviation or claw detachment.
After each shutdown, lightly brush the claw surface with a brass brush to remove flux residue and solder dross. Do not use steel brushes or hard objects to avoid scratching the surface (which leads to solder sticking).
Weekly: Inspect the gripping area; if solder build‑up or oxide layer is found, gently scrape it off with a blade to keep the gripping surface flat.
Every 3 months, remove the claws and thoroughly clean them using an ultrasonic cleaner with a neutral solvent to remove deep carbon deposits and oxides.
Check claw deformation: if the tip is bent or worn >0.2 mm, or if the claw slips or misaligns when gripping a PCB, replace immediately.
Also check chain tension – a loose chain causes uneven stress on claws and accelerates wear.
Do not strike the claw with hard objects – titanium alloy can crack or deform.
Avoid prolonged high‑temperature baking with an empty pot – this increases oxidation and thermal deformation.
When replacing claws, replace the whole set – mixing old and new claws can cause height differences leading to PCB transport misalignment.
The SA‑3 titanium claw is a consumable part for wave soldering machines. Under normal operating conditions, its service life is approximately 3‑6 months, heavily influenced by flux type, solder pot temperature, and PCB edge cleanliness.
Replace earlier if any of the following occurs:
Hook tip worn – cannot stably grip the PCB edge.
Large‑area oxidation on the claw surface – frequent solder sticking causes board jams.
Claw deformation or uneven spacing – leads to PCB drop‑off or misalignment, causing poor soldering.
LCX Copyright © 2026 All Rights Reserved.